Hello everyone! I'm Kim from Maiden D'Shade and I am so happy to be here today on Homemaker in Heels!
Crystal was the first blogger to feature one of my posts and I'm so honored to be her guest today.
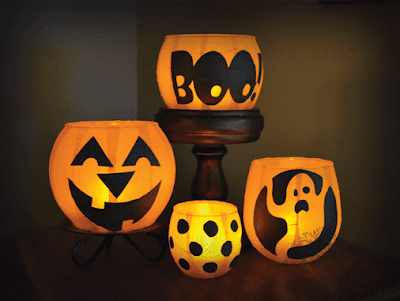
What I'm going to share with you today is a project that I wanted to do last year but didn't get to (because I couldn't find orange tissue paper until after Halloween). Pumpkin Votive Luminaries. I saw it in a magazine last year (maybe Taste of Home?) using jars. But I thought these glass votive holders (from Dollar Tree, thrift stores, your basement, etc.) would make fabulous pumpkin luminaries!
So, I cut strips of orange tissue paper an inch or two wide and longer than the height of each glass.
Then I decoupaged each strip on the glass. (I used watered down Mod Podge like I did here.)
I cut the bottom ends of the strips so that when I decoupaged them they would lay as flat as possible.
Then using an X-Acto knife I carefully trimmed the excess tissue paper from the top and added more decoupage medium along the rim. While that was drying, I printed out shapes on the computer.
Then I cut them out and decoupaged them onto the votives. (Be careful, the color may run depending on your printer/ink.) You could also cut shapes out of construction paper or scrapbook paper.
I put battery operated tea lights in them and they're done!
Love them!! Total cost $8 (glass, lights, tissue)!
Thank you, Crystal, for having me over today!


Wow! Super cute! I just might have to make these :-)
ReplyDeleteThese are adorable and very festive!
ReplyDeleteThose are so cute! I love the cute shapes on the front! So cool:)
ReplyDeleteVery nice Kim I will made some for my home!
ReplyDeleteHi, Crystal
ReplyDeleteI love Kim's tutorial! Super Cute. I just happen to stumble upon your blog, love looking around. I am a new follower, love for you to stop by www.homesweetbutterfly.com.
Have a great week.
Vanessa
These luminaries are adorable! Great tutorial :)
ReplyDeleteSo cute!! I really love these.
ReplyDelete