PhotobucketPhotobucketPhotobucketPhotobucketPhotobucketPhotobucket
Showing posts with label DIY Gift Ideas. Show all posts

Tuesday, March 6, 2012

Bright and Sassy Houndstooth & Flower Wreath


 Hey there gorgeous friends! Today I am sharing with you a slightly different take on houndstooth. If you have followed me for very long, you probably know that we are HUGE fans of the Alabama Crimson Tide. That is just the beginning of my love for houndstooth. I am always looking for ways to use it all over the house to decorate, without necessarily using a football theme. 
  Well, I have a major case of Spring Fever right now. I have been in a creative rut the for the past few months, probably the winter blues :) Plus, J is feeling a little better lately, so I have had a little more time to work on crafty things. Between that and some pretty weather recently (and the fact that I have been gluten-free for exactly 1 month tomorrow and I feel SO much better!), I feel like I am experiencing creative overload! Finally! I LOVE all of the bright colors that are hot for Spring this year, so I decided to incorporate those colors into a fun new project... I have to tell you, this is probably my favorite project of everything I have ever made! I just love the end result! 
   I apologize, but I don't have step-by-step pics! I'm so sorry! I will explain to you how I made it, and I feel sure that you will understand. :) If not, feel free to ask me any questions you may have! 


Materials used:

  • 14 inch straw wreath {Don't bother removing the plastic wrapping. It will just make a mess and I find that it is much easier to glue the fabric to the plastic than to the straw.}
  • Houndstooth fabric {I THINK it took about a half yard}
  • Hot glue gun and glue sticks
  • Felt in a variety of colors
  • scissors
First... Cut your houndstooth fabric into long strips, about 3-4 inches wide. 


Next... Begin wrapping the fabric around the wreath, making sure not to leave  of the straw exposed. As you wrap, glue, using your hot glue gun. Just keep wrapping and gluing, wrapping and gluing. You get the idea. ;)


Now that you have completely covered the wreath with houndstooth, it is time to start making lots of colorful felt flowers! I made these while watching a movie the other night. Not sure how to make the flowers? Go here to see my tutorial for this easy little flower I call the Chloe Rosette


  I made my flowers in a variety of sizes. I am a pretty random person, so I just attached them {with my handy little hot glue gun} to the wreath as I made them. This way, I was able to better see what colors and sizes I needed to make. 
  
Finally, you have a gorgeous new wreath for Spring!  ;) 


  I hope you enjoy your wreath as much as I do! :) If you decide to make one, I would love to see pics!  I think I am also going to make one for my Etsy shop, so if you don't have time to make one, feel free to stop by and I will hook you up with your very own at a very reasonable price! :) Then we could be wreath twinkies! =)) Ok, so, yeah, that was cheesy! Don't you judge! Have a great day! 


Weekend Bloggy Reading
http://www.homestoriesatoz.com/2012/03/tutorials-tips-link-party-51.com
http://www.sugaranddots.com/

Friday, February 17, 2012

Weekend Craft Soiree & Blog Hop {37}

  Happy Weekend everyone!!! Thanks so much for stopping by! I hope you have wonderful plans for this President's Day Weekend!! I am always so happy to have you here and I'm also excited to be getting back on track with the Weekend Craft Soiree & Blog Hop! :)


Here are the fantastic features from the last party! Be sure to stop by and show these sweet, talented ladies some love! 


 These Valentines Apothecary Jars from Lindsay at artsy-fartsy mama are absolutely adorable! Such a pretty and easy way to add some Valentine's Decor  without spending a lot on money doing so! 


You have to check out how EASY these fabulous Zebra Cupcakes from Kim at the Sasse life are! Are these fabulous or what?!


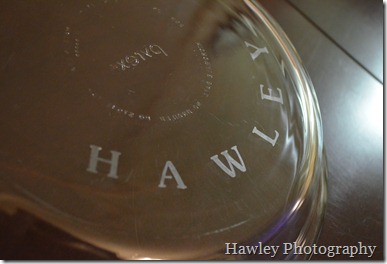
Want to make an Etched Glass project, but don't have a silhouette, cricut, etc? No worries! Darby at Life With the Hawleys shared and amazingly easy Etched Glass Tutorial
DSC_0368


I am absolutely LOVING this adorable Argyle Valentine Wreath from Cassity at Remodelaholic!!! SO very pretty!!! 
Making an Argyle Valentines wreath (60) did


Kim at too much time on my hands did such a lovely job on her beautiful Rustic Window Treatment with Stenciled Curtains


Katie at Creatively Living shared a great tutorial for making this gorgeous Master Bath Wall Art


Thank you all for sharing your fabulous projects!
I hope you make a few new friends while you were here!
If you were featured this week, feel free to grab a "featured" button.


Party Rules:
  • Become a follower of Homemaker in Heels. Let me know, so I can follow you back! 
  • Link up your favorite craft, DIY project, recipe, tip, post... you get the idea. Please link to the actual post URL, **NOT YOUR MAIN URL**
  • Do NOT link up items in your Etsy Shop, unless you have a tutorial
  • PLEASE mingle a little while and leave a comment on at least the 2 projects posted before yours. This is a blog hop, so follow a couple others and if someone follows you, be sure to return the favor and follow that person back.
  • Grab a button or link back to Homemaker in Heels somewhere on your blog.


Monday, July 25, 2011

Chevron Dry Erase Board

   Hello! I hope you all had a wonderful weekend! I am finally pleased to say that I have a new project to show you! :)
   I am constantly having to write myself little notes.  I seriously have post-it notes everywhere! Can  anyone relate? :) This weekend I decided do create a project that would do away with all of my little "reminder" notes. I created a dry erase board for my kitchen. In my kitchen, all of my appliances, floors, and countertops are black. The cabinets are all white, and the walls are a dark tan color. I have decided to make yellow my main accent color. This was a great way to add color and function to my space! It was SOO easy!

Materials used:
Picture frame (14x18)
Chevron fabric I had left over from making pillow covers (you can order it here)
** I have also made these as gifts using scrapbooking paper


This is all you have to do:
Cut your fabric to fit your frame

Iron it really well and place it inside your frame just the way you would a photo.


You can also embellish it with flowers, vinyl, anything that tickles your fancy! :) I decided to leave mine just as it is.


If you will look at the door in this pic, look closely and you will see that the door actually slides into the wall. This leads into the dining room and really is a great way to divide the rooms...

I hope you have a SUPER wonderful week!

I will be linking...
http://www.homestoriesatoz.com/

Thursday, July 21, 2011

Cute Bookmark Tutorial by Jenni from Kissed By a Frog

   Happy Thursday, y'all! I am so excited that the sweet Jenni from Kissed by a Frog has a wonderful guest post for us today! If you aren't following her blog already, you are really missing out and I hope you will stop by Kissed by a Frog and show some love! I just love it! Here's Jenni...

kissed by a frog
   Hello Homemaker in Heels readers! I am so excited to be here with you all today! I just LOVE Crystal's blog! Every time I stop in for a visit I feel so happy! She and her blog just exude happy bubbly wonderfulness~ Don't you think?
   Anywhoooooo, I live with my husband and our 4 wonderful children in Kansas City. I blog about all sorts of things but I am really just getting started and trying to find my niche.  You can find information about us renovating our house and making it a home, kids crafts, educational ideas, gift ideas, and whatever else seems to tickle my fancy that day. I started blogging in June as a way to journal, as I try to start my own business and keep my house running. So far, so good. Once a week I feature my favorite blogging buddy. I have met some amazing people through blogging! And every Thursday I have a Linky Party. But enough about me! LET'S GET OUR CRAFT ON!!!
   I LOVE craft projects that are easy enough to finish while watching How to Train Your Dragon (which I watch daily btw) and that I can have my kids be involved. I had planned a really cool tutorial for you all but it was a total craft FAIL in my book so I must try it again and see what went wrong. So, I decided to show you all a SUPER EASY, super CUTE craft that you can make in literally a minute.

ENVELOPE BOOKMARKS
Supplies needed:
Square Envelopes (mine are 4 ¾ x 4 ¾ )
Stickers or Embellishments of your choice
A paper cutter or scissors
A Pencil
Seriously that is all you need!
Here are your supplies
Measure, using your book of choice, 
where you would like your book mark to fit 
over the corner of your page.   
See my mark on the right.
Line up your mark with your paper cutter or scissors
and CUT. 
If you would like a more precise corner measure
both side equally, I measured 10" on one side and ten
on the other.

Line up both marks and CUT. 
OR if you cannot find a pencil or pen or you
just don't want to, line up the envelope like a diamond
and cut from one corner to the other.
See how easy that is!!! And think about how you
can recycle or up-cycle all that junk mail you get!!
Okay, now here come the hard part!
Add your sticker and embellishment where you would
like and voila...
ALL DONE!
Aren't these little Robot Dudes soooo
cute??
I added a leftover flower to one as well!
A little to big for this book.
Fits just right! Now how stinking easy was that??
Check out these that my 6-year-old daughter made...

She used her favorite craft book:
water colors, some of her stickers, and a pen to make hers.
HAHA She made a frog! LOVE it! 
Her Stickers. She said she added the red ribbon
because she is a real princess. TOO CUTE! 
And a mermaid and her father with a fish.
Aren't they cute!!

Thanks for having me over to play, I hope all you loverly readers enjoyed my tiny little tutorial!
I hope you will stop by Kissed By a Frog when you have some time and check out some of my projects and tutorials. Here is just a little sampling of what you will find:
My most popular tutorial, a father's day gift:


getting away frog BORING BROWN and adding
some fun COLOR to our lives!!

Every Monday- I blog about stuff for
Mamas, even educational stuff.

tutu ever!

  
 What a cute and fun idea! These bookmarks would make CUTE gifts! Thank you SO much for stopping by, Jenni! Don't forget to stop by and visit her sometime at Kissed by a Frog! Hope you all have a wonderful day! :)

Thursday, June 9, 2011

No-Sew Rosette Coasters

  
   Lately, I have been making up lots of rosettes for another project I have been working on. Tonight, Jeff thought of the cutest idea! Rosette Coasters! I love how he supports my blog! He actually comes up with half of my project ideas! He has Lyme disease (from a tick bite) which has prevented him from being able to walk over the past couple of years. He was SO athletic before becoming sick. He could be so bitter, but he is so totally opposite of that! It is amazing how great of an attitude he always has! With lots of prayer and the amazing power of God's healing, I feel sure he will be able to overcome this awful disease.
    Anyways, back to the project... :) I had a few rosettes that I made really thin and flat and these were perfect for my cute new coasters! If you would like to see how to make the no-sew rosettes, I have a tutorial here. Just make them slightly larger than the one in this tutorial for your coasters.
    I already had a roll of corkboard that I purchased at Hobby Lobby a little while back. I used a spray paint can to trace circles and used scissors to cute these out. Then I just used my handy little hot glue gun and glue the cork to the bottom of my rosettes. And there ya have it! That is how I made my amazing little coasters!


    I think these would be great little gifts! I plan to make lots more! I hope you all have a wonderful weekend! Remember to never take anything for granted. We all take being able to walk for granted every single day, rather than realize what a gift it actually is. Also, please remember Jeff in your prayers...
The coasters match my NoSew Burlap Rosette Lamp PERFECTLY!  They look so cute and are the perfect size for my glass of Southern SWEET iced tea! :)