PhotobucketPhotobucketPhotobucketPhotobucketPhotobucketPhotobucket
Showing posts with label DIY Home Decor. Show all posts

Tuesday, March 6, 2012

Bright and Sassy Houndstooth & Flower Wreath


 Hey there gorgeous friends! Today I am sharing with you a slightly different take on houndstooth. If you have followed me for very long, you probably know that we are HUGE fans of the Alabama Crimson Tide. That is just the beginning of my love for houndstooth. I am always looking for ways to use it all over the house to decorate, without necessarily using a football theme. 
  Well, I have a major case of Spring Fever right now. I have been in a creative rut the for the past few months, probably the winter blues :) Plus, J is feeling a little better lately, so I have had a little more time to work on crafty things. Between that and some pretty weather recently (and the fact that I have been gluten-free for exactly 1 month tomorrow and I feel SO much better!), I feel like I am experiencing creative overload! Finally! I LOVE all of the bright colors that are hot for Spring this year, so I decided to incorporate those colors into a fun new project... I have to tell you, this is probably my favorite project of everything I have ever made! I just love the end result! 
   I apologize, but I don't have step-by-step pics! I'm so sorry! I will explain to you how I made it, and I feel sure that you will understand. :) If not, feel free to ask me any questions you may have! 


Materials used:

  • 14 inch straw wreath {Don't bother removing the plastic wrapping. It will just make a mess and I find that it is much easier to glue the fabric to the plastic than to the straw.}
  • Houndstooth fabric {I THINK it took about a half yard}
  • Hot glue gun and glue sticks
  • Felt in a variety of colors
  • scissors
First... Cut your houndstooth fabric into long strips, about 3-4 inches wide. 


Next... Begin wrapping the fabric around the wreath, making sure not to leave  of the straw exposed. As you wrap, glue, using your hot glue gun. Just keep wrapping and gluing, wrapping and gluing. You get the idea. ;)


Now that you have completely covered the wreath with houndstooth, it is time to start making lots of colorful felt flowers! I made these while watching a movie the other night. Not sure how to make the flowers? Go here to see my tutorial for this easy little flower I call the Chloe Rosette! 


  I made my flowers in a variety of sizes. I am a pretty random person, so I just attached them {with my handy little hot glue gun} to the wreath as I made them. This way, I was able to better see what colors and sizes I needed to make. 
  
Finally, you have a gorgeous new wreath for Spring!  ;) 


  I hope you enjoy your wreath as much as I do! :) If you decide to make one, I would love to see pics!  I think I am also going to make one for my Etsy shop, so if you don't have time to make one, feel free to stop by and I will hook you up with your very own at a very reasonable price! :) Then we could be wreath twinkies! =)) Ok, so, yeah, that was cheesy! Don't you judge! Have a great day! 


Weekend Bloggy Reading
http://www.homestoriesatoz.com/2012/03/tutorials-tips-link-party-51.com
http://www.sugaranddots.com/

Saturday, February 25, 2012

Weekend Craft Soiree {38}

Happy Saturday, Lovelies! I hope you have lots of fun plans for this beautiful weekend! :) First off, I have a little announcement. You may have already heard, but I just wanted to take a moment and fill you in just in case you haven't. :) Did you hear that Google Friend Connect is going away soon?! It will end this month for non-Blogger blogs, and will eventually be gone altogether! If you look over on the right side you will now see the option of following with Linky Followers! I actually think it is going to be so much better than GFC! There are so many more options to sort out the blogs you follow into categories, etc! I would love for all you to take a sec and start following me through Linky Followers and/or subscribe via RSS feed! Please let me know and I will follow you back! I would hate to lose contact with you all! :) 

Y'all have been SO amazing lately! Well, you are already amazing, but all of these projects lately have just been EXTRAordinary! Here are a few highlights from last weekend! 


Katie at Creatively Living has done a spectacular job on her Reading Nook Project! You won't believe how this space looked a few short weeks ago! Here she shares her Reading Nook Curtain Tutorial. I don't know about you, but this makes me really, really want to create a reading nook of my own! 


And look what a fantastic job Kelley at Miss Information did creating this Shipping Pallet Towel Rack for her boys' bathroom! I just love it! 


Cassity at Remodelaholic used a pallet to Frame in A Wall Mount Television!!! This is absolutely brilliant! I love the contrasted look of the old pallet with the new "high tech" tv! She shares a great, easy to follow tutorial, too! 
IMG_1221


Here is another fabulous pallet project! Kristi at I Should Be Mopping the Floor used a pallet to create this beautiful Pallet HeART!!! 


Melissa at Shabby Love did a wonderful job on this pretty Rustic Heart Wreath! Is this adorable or what?! 


Look how ADORABLE these Baby Boots are!!! Rose at A Rosie Sweet Home shared a fabulous So Stinkin' Cute Baby Boots tutorial! 


Thank you all SO much for stopping by and sharing your fantastic projects!
I hope you made a few new friends while you were here!
If you were featured this week, feel free to grab a "featured" button.


Party Rules:
  • Become a follower of Homemaker in Heels. Let me know, so I can follow you back! 
  • Link up your favorite craft, DIY project, recipe, tip, post... you get the idea. Please link to the actual post URL, **NOT YOUR MAIN URL**
  • Do NOT link up items in your Etsy Shop, unless you have a tutorial
  • PLEASE mingle a little while and leave a comment on at least the 2 projects posted before yours. This is a blog hop, so follow a couple others and if someone follows you, be sure to return the favor and follow that person back.
  • Grab a button or link back to Homemaker in Heels somewhere on your blog.


Friday, February 17, 2012

Weekend Craft Soiree & Blog Hop {37}

  Happy Weekend everyone!!! Thanks so much for stopping by! I hope you have wonderful plans for this President's Day Weekend!! I am always so happy to have you here and I'm also excited to be getting back on track with the Weekend Craft Soiree & Blog Hop! :)


Here are the fantastic features from the last party! Be sure to stop by and show these sweet, talented ladies some love! 


 These Valentines Apothecary Jars from Lindsay at artsy-fartsy mama are absolutely adorable! Such a pretty and easy way to add some Valentine's Decor  without spending a lot on money doing so! 


You have to check out how EASY these fabulous Zebra Cupcakes from Kim at the Sasse life are! Are these fabulous or what?!


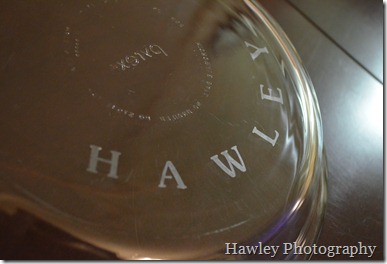
Want to make an Etched Glass project, but don't have a silhouette, cricut, etc? No worries! Darby at Life With the Hawleys shared and amazingly easy Etched Glass Tutorial! 
DSC_0368


I am absolutely LOVING this adorable Argyle Valentine Wreath from Cassity at Remodelaholic!!! SO very pretty!!! 
Making an Argyle Valentines wreath (60) did


Kim at too much time on my hands did such a lovely job on her beautiful Rustic Window Treatment with Stenciled Curtains! 


Katie at Creatively Living shared a great tutorial for making this gorgeous Master Bath Wall Art! 


Thank you all for sharing your fabulous projects!
I hope you make a few new friends while you were here!
If you were featured this week, feel free to grab a "featured" button.


Party Rules:
  • Become a follower of Homemaker in Heels. Let me know, so I can follow you back! 
  • Link up your favorite craft, DIY project, recipe, tip, post... you get the idea. Please link to the actual post URL, **NOT YOUR MAIN URL**
  • Do NOT link up items in your Etsy Shop, unless you have a tutorial
  • PLEASE mingle a little while and leave a comment on at least the 2 projects posted before yours. This is a blog hop, so follow a couple others and if someone follows you, be sure to return the favor and follow that person back.
  • Grab a button or link back to Homemaker in Heels somewhere on your blog.


Monday, July 25, 2011

Chevron Dry Erase Board

   Hello! I hope you all had a wonderful weekend! I am finally pleased to say that I have a new project to show you! :)
   I am constantly having to write myself little notes.  I seriously have post-it notes everywhere! Can  anyone relate? :) This weekend I decided do create a project that would do away with all of my little "reminder" notes. I created a dry erase board for my kitchen. In my kitchen, all of my appliances, floors, and countertops are black. The cabinets are all white, and the walls are a dark tan color. I have decided to make yellow my main accent color. This was a great way to add color and function to my space! It was SOO easy!

Materials used:
Picture frame (14x18)
Chevron fabric I had left over from making pillow covers (you can order it here)
** I have also made these as gifts using scrapbooking paper


This is all you have to do:
Cut your fabric to fit your frame

Iron it really well and place it inside your frame just the way you would a photo.


You can also embellish it with flowers, vinyl, anything that tickles your fancy! :) I decided to leave mine just as it is.


If you will look at the door in this pic, look closely and you will see that the door actually slides into the wall. This leads into the dining room and really is a great way to divide the rooms...

I hope you have a SUPER wonderful week!

I will be linking...
http://www.homestoriesatoz.com/

Tuesday, June 21, 2011

DIY Topiary Tree

I have such a love for topiary trees of any kind! I have been wanting some for my home, but, of course, I refuse to pay the expensive price that retail stores charge. That being the case, I decided to create my own.


Materials Used:
1 wire clothes hanger
newspapers
hot glue gun
Spanish Moss
1 stick approximately 18 inches long (needs to be straight) , a wooden dowel can also be used.
small planter/ pot
white paint


First, I twisted my wire hanger into a "coil" shape.


I then wrapped newspaper completely around the wire, gluing it as I went.


   The next step was the most time-consuming. I began gluing the Spanish moss to the newspaper. Spanish Moss is so messy. I used scissors to cut the moss into the portions I needed as I went. Once I had completely covered the newspaper with moss, I used scissors to trim up any excess to give it a neater, cleaner appearance.
   Then, I went outside and found a stick. I glued it to the inside of my topiary. I wadded up some newspaper and out in my little pot (that I painted white). Foam can also be used. I just used newspaper, because I wanted to keep this project as thrifty as possible. I used this to hold my topiary in place.


optional: I used red, white, and blue ribbon to make this more patriotic with the 4th of July coming up. I simply cut my ribbon to the correct length, wrapped it around and secured it with clear tape on the back. This way, I can remove it easly when the holiday is over. ;)

Thursday, June 2, 2011

DIY Scrappy Rag Wreath


    Lately I have been "summerfying" my bathroom and I have got to create a few things to help decorate the walls. It has been a while since I have made a wreath, so I decided to throw together an easy one! It didn't cost me anything to make!  That is my favorite kind of project!


Materials Needed:
  • Fabric scraps ( about 1" wide x 6" long)
  • old wire hanger
  • a good movie or tv show... you will be tearing strips of fabric for a little while
   First, I twisted my hanger into a circle for the wreath. I made it about 10 inches wide. Don't worry, it doesn't have to be perfect, lots of fabric will be covering the wire soon!

   After I finished tearing my fabric strips, I began tying them around the wreath, then pushing them together. I also used some ribbon, ric rac, and tulle. I continued this until I was completely finished. I used aqua, pink, yellow, and green fabrics. I decided to add this little scripture rock using twine. It actually was a keychain before! One great thing about a rag wreath is that you can do one for any season, just by using different colors!


This hand towel was the inspiration for my color choices.


I hope you are having a wonderful week! :)

I'll be linking here: http://tidymom.net/
and more parties listed on my sidebar


Wednesday, May 4, 2011

No-Sew Ruffled Patriotic Lamp


   In the light of our Military finally taking down Osama bin Laden this week, I am feeling full of patriotism. I don't think I have ever been more proud to be an American. I actually started working on this lamp using dropcloth and a floral turquoise fabric. As lovely as it was, I decided to change the fabric up a bit for a little more of a patriotic look. Now it is red, white, and turquoise blue. :) Since doing No-sew Burlap Rosette Lamp project, I have had some request for more "no-sew" projects. This cold easily be made by using a sewing machine to make the ruffles, but for all of you who do not sew, I created this tutorial for you. :) Please excuse the picture quality. I had to use the camera on my phone for the finished project pics.

Materials I used:
Lamp
Spray Paint (Krylon Blue Ocean Breeze)
3 inch wide strips of fabric
hot glue gun

First, I  sanded the base of the lamp. I did this because the paint will adhere to the rougher surface much better. Next, I painted the lamp base. I used 2 coats of Krylon Blue Ocean Breeze.
There was an old pleated plastic cover over the actual lampshade. I was able to simply pull it off.


Now, onto the fun part! :) Creating the ruffles without using a sewing machine...
**I only have photos on this computer that were taken when I started the lamp using the other fabric. I am posting these for now, but I promise my other pics uploaded soon. The tutorial will make more sense when I have all pics added.
I cut the fabric into long, 3 inch wide strips. Using my hot glue gun, I glued the end of the strip of fabric onto the bottom of the lampshade. I let the fabric overlap the bottom of the lampshade by about an inch and a half.
   To create the ruffled look: As I began gluing the fabric around the lamp, I "pinched" the fabric about every inch. Between where I would pinch it into a ruffle, I applied a little hot glue. I continued this all the way around until I got to the top. I overlapped each row about an inch over the row below it. Around the top, I had about a half inch left, so I used some ruffled lace and glued it around the top on the inside. This seems to add to the patriotic look. :)
   I love the end result and and I will be making over a few more lamps this way in the near future using different fabrics. :)

Wednesday, April 13, 2011

Framed Chalkboard with Chalk Holder~$1


When I saw this picture at a yard sale the other day, I knew it would be the perfect size for the chalkboard I have been wanting to make for my kitchen. When I heard the awesome price of $1, I bought it, of course.

   Initially, I was going to paint the frame white, so I used newspaper to cover the glass and started to clean the frame to prep for painting it. It was then, that I realized what a beautiful frame it actually is! It was covered in so much dust, that I had no idea. The light gold-pewter color was perfect, not too brassy looking, just perfect! So, I finished cleaning my frame and removed all of the newspaper that was covering the glass. I then took some Glad Press 'n Seal Plastic wrap, and used this to cover the frame.

   I painted 2 coats (letting the first dry before applying the second) of Krylon Chalkboard spray paint. I happened to already have this onhand from a previous project, so it wasn't an expense. :)
  I knew I wanted something to hold a piece of chalk, because what is the point of having a convenient chalkboard, without also having chalk right there handy? I decided to cut about a 3 inch piece of ribbon to use for this. I then took some velcro dots and applied one on each end on opposite sides of the ribbon, so that I could wrap the ribbon aroung the chalk. The velcro isn't absolutely necessary, but it does help to hold the chalk a little more securely.


 At this point I simply used my hot glue gun to attach this to my frame, and that's it! Now, I have an fabulous new chalkboard in my kitchen for the whopping cost of $1! :)

Sunday, March 20, 2011

Anthro-Inspired Driftwood Hurricane, Cost: $0!

  
   I am in the process of trying to get some Spring cleaning accomplished, so I'm so sorry I haven't been able to get a lot of posts up this week! It is hard enough to get any cleaning done as it is with this right brain personality type! Haha. Can anyone relate? Every time I start accomplish something, I get distracted by one thing or another. Usually something cool I find while organizing! LoL. Focusing on the project at hand has got to become something I make more of a habit of.
   Anyways, right now, I am trying to have a zero, or as close as possible to zero dollars, crafting budget. Any crafting projects I do, I want to be able to use to coordinate in my decor. When I saw this Driftwood Hurricane in Anthro the other day, I knew I had everything I would need to make my version of it already on hand!
Driftwood Hurricane
This is Anthro's version in 2 different sizes.
   To be completely honest, I am not too awfully fond of these. I just don't care for the black colored "sticks" or driftwood pieces. I decided to do a Spring version. At first I thought about white, then I remembered that I still had some Krylon Blue Ocean Breeze spray paint from my Burlap Rosette Lamp project. Perfect! I have been wanting to redecorate the living room with shades of this color, anyway.

Here are the materials I used for this project:
  • Hurricane Glass from $1 tree (already had onhand)
  • Sticks from my backyard
  • hot glue gun
  • spray paint (already onhand, also)
TOTAL $ SPENT: ZERO!
Anthro version Price: $78!
  
   I just went out into my backyard and picked up lots of sticks.


 I then broke them up into random appropriate size.
I spray-painted all of my sticks. Waited for this paint to dry, turned them over, and finished painting them.


   After the paint was completely dry, I began using my hot glue gun to glue the sticks to my hurricane glass/vase. Some of my sticks were curved in various directions and were a perfect fit. They seemed to just "wrap" around the glass prefectly!  Others I had to work with a little. That is all there was to it! I now have MY version of this Anthropologie Driftwood Hurricane!


Their cost: $78
My cost: $0! :)